Peptide stability testing is the systematic process of measuring how a peptide degrades over time under defined storage, formulation, and stress conditions, using validated analytical methods to detect and quantify that change. A defensible program requires three things done correctly: matrix-appropriate sample preparation, a validated stability-indicating method built on RP-UPLC paired with LC-MS, and study design that follows ICH Q1A(R2)%20Guideline.pdf). Researchers who skip any one of these three generate data that looks clean but won't survive scrutiny, whether that scrutiny comes from a regulator, a peer reviewer, or a colleague repeating the assay six months later.
TL;DR:
- Peptide stability testing requires a validated method based on RP-UPLC and LC-MS, with correct sample preparation and study design aligned to ICH guidelines.
- Sample preparation, including precipitation solvent choice and matrix selection, significantly influences apparent stability and must be standardized across studies.
- Proper storage involves keeping lyophilized peptides at -20°C to -80°C, aliquoting on reconstitution, and avoiding repeated freeze-thaw cycles or moisture exposure.
- Forced degradation studies, using acid, base, oxidation, heat, humidity, and light, reveal specific degradation pathways to inform study design and formulation strategies.
- Starting material verification at ≥99% purity through HPLC and mass spectrometry is essential to ensure accuracy and prevent false instability signals.
Table of Contents
- What Does a Peptide Stability Testing Protocol Actually Involve?
- What Are the Best Storage Practices for Research Peptides?
- How Do You Build a Stability-Indicating Analytical Method?
- How Do You Run Forced Degradation Studies on Peptides?
- How Do You Design an ICH-Aligned Peptide Stability Program?
- Why Do Stability Results Look Wrong When the Peptide Isn't?
- How Does Supplier QA Reduce Variability in Stability Studies?
- What Actually Moves the Needle in Peptide Stability Work
- Source Verified Peptides for Your Stability Studies
- Sources
- FAQ
What Does a Peptide Stability Testing Protocol Actually Involve?
No two labs run the exact same peptide stability protocol, and that inconsistency is precisely why comparing results across studies is so difficult. A protocol-comparison study examining peptide stability in blood plasma and cell-culture supernatants found that sample-preparation and precipitation choices materially change the apparent stability of the same peptide in the same matrix. Change the precipitation solvent ratio, and you change the recovery. Change the recovery, and you change the half-life you report.
Matrix selection drives everything downstream. Plasma, serum, and cell-culture media each carry distinct protease loads, protein-binding profiles, and pH buffering capacities, and donor-to-donor variability in plasma alone can shift apparent degradation rates enough to make a stable peptide look marginal. A peptide that shows a four-hour half-life in pooled human plasma might show something entirely different in a single donor's sample, purely because of endogenous peptidase activity that has nothing to do with the compound's intrinsic chemistry.
Incubation design is where most avoidable variability creeps in. Get these variables locked down before you touch a pipette:
- Peptide concentration: too high saturates enzymatic degradation pathways and produces falsely optimistic half-lives; too low risks detection limits confounding your read.
- Enzyme or matrix protein content: pooled plasma, individual donor plasma, and serum all carry different protease burdens, so specify the source and lot.
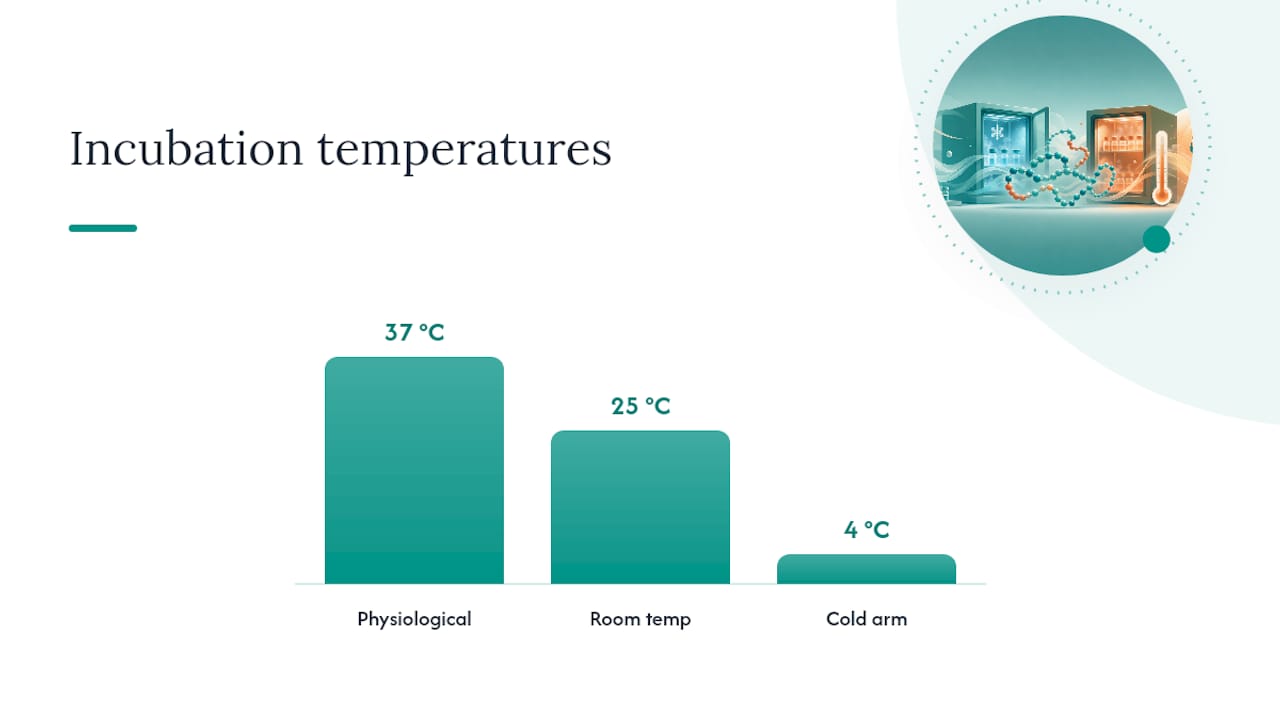
- Temperature: 37°C mimics physiological conditions, but many labs also run 25°C and 4°C arms to build a full degradation curve.
- Duration and time points: front-load early time points (0, 15, 30, 60 minutes) if you expect fast degradation, then space out later points for slow degraders.
- Precipitation method: organic solvent choice (acetonitrile, methanol, or trichloroacetic acid) and solvent-to-sample ratio each introduce a distinct recovery bias, so keep the ratio fixed across your entire study.
The precipitation step deserves particular attention because it's the most commonly under-reported variable in published peptide degradation analysis. A 3:1 acetonitrile precipitation and a 4:1 methanol precipitation on the same plasma sample can produce measurably different peptide recovery percentages, which then get incorporated into the apparent stability curve without anyone flagging it. If your lab is benchmarking against a published protocol, replicate the exact solvent, ratio, and centrifugation parameters, not just the general approach. Standardization isn't a bureaucratic nicety here. It's the only way your data means anything outside your own bench.
What Are the Best Storage Practices for Research Peptides?
Storage errors are the single most common source of false degradation signals in peptide research, and most of them are preventable with disciplined handling rather than expensive equipment. Getting this right protects the integrity of every downstream stability assessment of peptides you run.
- Store lyophilized peptides at −20°C to −80°C for long-term stability. Lyophilized material stored in this range consistently outperforms solution-stored peptide for extended timelines, according to handling recommendations for peptides used in mass spectrometry assays. Reconstituted solutions have a much shorter practical shelf life at 4°C depending on sequence, so treat solution storage as a short-term working format, not a long-term archive.
- Warm vials to room temperature before opening. Opening a cold lyophilized vial invites condensation, and that moisture uptake accelerates hydrolysis and aggregation over repeated openings. Let the vial equilibrate to ambient temperature for 15 to 20 minutes first.
- Aliquot on first reconstitution, not on later use. Splitting a stock solution into single-use aliquots immediately after reconstitution eliminates the need to freeze-thaw a shared stock repeatedly, which is one of the most reliable ways to introduce artificial degradation into your data.
- Re-seal under inert gas when a vial will see multiple future openings. Blanketing the headspace with argon or nitrogen limits oxidative exposure for sequences carrying methionine, cysteine, or tryptophan residues, which are the most oxidation-prone.
- Choose vial material deliberately. Comparative work on peptide handling shows polypropylene vials often outperform non-deactivated glass for peptide recovery, particularly for hydrophobic or low-abundance peptides that adsorb readily to untreated glass surfaces.
- Condition the autosampler before a run, not during it. Autosampler equilibration errors disproportionately affect low-abundance peptides and can produce a signal drift that mimics degradation when none has occurred.
- Add antioxidants or chelators only where the sequence justifies it. A peptide with no oxidation-susceptible residues doesn't need methionine-protecting additives, but one with an N-terminal cysteine or a tryptophan in a solvent-exposed position often benefits from a low concentration of a reducing agent in solution storage.
Avoiding frost-free freezers matters more than most researchers assume. Frost-free units cycle through periodic warming defrost phases that your sample experiences as an unplanned freeze-thaw event, even when the door never opens. A manual-defrost or ultra-low freezer with a continuous temperature log removes that variable entirely.
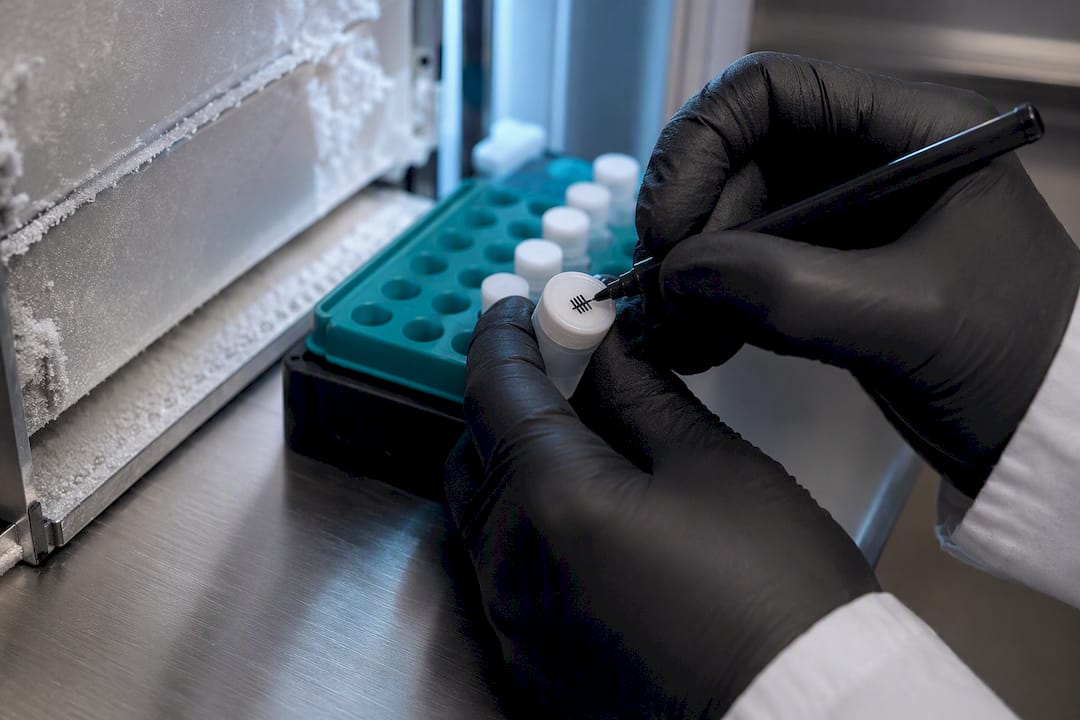
Pro Tip: Log every freeze-thaw event on the vial label itself, not just in a digital record. A grease-pencil tally mark takes two seconds and prevents the all-too-common mistake of pulling a "fresh" aliquot that's actually been cycled four times by three different people.
For deeper protocol detail on this, Peptasticlabs has published a lab SOP for minimizing freeze-thaw damage and a lyophilized storage temperature guide that map directly onto the steps above.
How Do You Build a Stability-Indicating Analytical Method?
A stability-indicating method (SIM) has to separate the intact peptide from every degradant that could plausibly form, which means method development starts with forced degradation, not with the intact peptide alone. Build the separation around a stressed sample set, then confirm it resolves the parent from its breakdown products.
RP-UPLC forms the backbone of most peptide SIMs. Reverse-phase ultra-performance liquid chromatography, typically on a C18 or phenyl-hexyl phase, gives the resolution needed to separate closely related species like deamidated variants or oxidized isoforms that differ by a single mass unit or a few daltons. Ion-pairing agents such as trifluoroacetic acid improve peak shape for peptides but can suppress electrospray ionization downstream, so many labs switch to formic acid when the same method needs to feed directly into mass spec detection. Wavelength selection at 214 nm captures the peptide backbone amide bond broadly, while 280 nm adds selectivity for tryptophan- or tyrosine-containing sequences.
Pairing the separation with mass spectrometry is where degradant identification actually happens. High-resolution accurate-mass LC-MS/MS lets you assign exact structural changes: a mass shift of +0.98 Da flags deamidation, +16 Da flags oxidation, and a loss consistent with cyclization points toward diketopiperazine (DKP) formation at the N-terminus. Without MS confirmation, a UPLC method only tells you that something changed; it can't tell you what changed or why it matters clinically.
Method validation on stressed, not just fresh, samples is non-negotiable for a genuine SIM:
- Specificity: confirm the method resolves the parent peptide from every degradant generated under forced-degradation conditions, not just from unrelated impurities.
- Accuracy and precision: run spike-recovery experiments across the expected concentration range and confirm intra-day and inter-day precision meets your acceptance criteria.
- Robustness: vary column temperature, flow rate, and mobile-phase pH slightly to confirm the separation holds under normal day-to-day operating variation.
Internal standards deserve particular care in peptide work because a poorly chosen standard degrades faster than your analyte and quietly invalidates the whole run. Using β-amino-acid-based internal standards gives resistance to proteolytic degradation while closely matching the physicochemical behavior needed for accurate LC-MS quantification, an approach detailed in library-based degradation quantification methods.
Column maintenance is the operational detail that quietly determines whether your data holds up over a multi-week study. Direct-injection LC-MS approaches speed throughput and cut sample loss compared to solid-phase extraction, but column fouling from residual proteins and lipids becomes a real lifetime-limiting factor after repeated injections of complex biological matrices. The earliest warning sign is a loss of retention for hydrophilic peptides, often visible after just a few hundred injections of unprocessed biological samples. Track a normalized area ratio for a standard peptide mix at the start of every run; a noticeable downward drift from baseline is a reasonable trigger point to flag the column for review before it compromises real data. For a deeper comparison of when HPLC alone suffices versus when LC-MS becomes necessary, see Peptasticlabs' breakdown of HPLC versus LC-MS for peptide QC.
How Do You Run Forced Degradation Studies on Peptides?
Forced degradation exists to answer one question before you spend months on a long-term study: what actually breaks this peptide, and under what conditions? Running the stress panel first tells you where to point your SIM and which formulation levers matter.
- Acid and base hydrolysis. Expose the peptide to 0.1N HCl and 0.1N NaOH at elevated temperature for a fixed interval, then neutralize before analysis. Acidic conditions tend to promote aspartimide formation and peptide bond cleavage at aspartate residues; basic conditions accelerate deamidation of asparagine and glutamine.
- Oxidative stress. Hydrogen peroxide at low concentration (0.1 to 0.3%) reveals oxidation liabilities at methionine, cysteine, and tryptophan residues, typically showing up as a +16 Da mass shift on the affected residue.
- Thermal stress. Elevated temperature (40°C to 60°C) over days to weeks accelerates multiple pathways simultaneously, including aggregation and DKP formation at the N-terminal dipeptide when a proline or glycine sits in the second position.
- Humidity exposure. For lyophilized material, controlled humidity chambers reveal moisture-driven hydrolysis that wouldn't show up in a sealed, desiccated vial during normal storage.
- Photostability. ICH-aligned light exposure testing catches photo-oxidation, which matters disproportionately for tryptophan- and tyrosine-rich sequences and for peptides intended for topical or ophthalmic delivery.
A practical target for any stress condition is partial degradation, generally in the 5 to 20% loss range, rather than driving the sample to near-total destruction. Total degradation destroys the very degradants you need to characterize, while partial loss keeps both parent and breakdown products visible for structural assignment.
Each stress condition maps to specific sequence liabilities: deamidation clusters around Asn-Gly and Asn-Ser motifs, DKP formation shows up almost exclusively at the second N-terminal position when it's proline or glycine, and aggregation tends to correlate with hydrophobic patch exposure rather than any single residue. Once forced degradation identifies the dominant pathway, that finding should directly qualify your SIM (confirming it resolves the specific degradants you found) and should directly inform formulation decisions, whether that means adjusting pH, adding an antioxidant, or reconsidering the delivery vehicle.
Report every degradant with its retention time, accurate mass, and characteristic fragment ions, along with the acceptance threshold you're applying for each. A degradant cataloged without a fragment-ion confirmation is an assumption, not a finding.
How Do You Design an ICH-Aligned Peptide Stability Program?
Translating bench-level forced-degradation and SIM work into a program that supports a regulatory shelf-life or re-test claim means following ICH Q1A(R2) structure from the outset, not retrofitting it after the fact.
- Storage conditions: long-term studies typically run at ambient temperatures with controlled relative humidity depending on climatic zone; accelerated studies use elevated temperature and humidity conditions, and an intermediate condition may be used based on accelerated data showing significant change.
- Time points: quarterly testing through the first year, six-month intervals through year two, and annually thereafter for long-term studies; accelerated studies typically sample at 0, 3, and 6 months.
- Batch selection: at minimum three batches, ideally representing production-scale or pilot-scale material rather than small research lots, to support a credible shelf-life extrapolation.
- Container-closure system: test in the actual packaging intended for use or storage, since a peptide behaves differently in a glass vial with a rubber stopper than in a plastic cryotube.
- Stability-indicating attributes: define these from your forced-degradation results, tying each acceptance criterion to a clinically or functionally relevant threshold rather than an arbitrary round number.
Bridging strategies matter when a formulation or container change happens mid-program. Rather than restarting the full study, a well-designed bridging plan uses a shortened comparative stability arm to demonstrate equivalence between the old and new presentation, provided the degradation pathways identified during forced degradation are unaffected by the change.
Documentation expectations for a regulatory submission go beyond raw chromatograms. Reviewers expect a clear narrative connecting forced-degradation findings to SIM validation to the long-term study design, plus statistical trending of the stability data, commonly a regression analysis against time to project when the lower confidence bound crosses the acceptance limit. Continued process verification after market approval extends this same trending logic to ongoing production batches, catching drift before it becomes a compliance issue.
Why Do Stability Results Look Wrong When the Peptide Isn't?
Most "unstable" peptide results in early-stage testing turn out to be artifacts, not real chemistry, and untangling the two saves weeks of misdirected formulation work.
Run this checklist before concluding a peptide is genuinely unstable:
- Replicate across donors or matrix lots. If one plasma donor shows rapid loss and three others don't, you're looking at donor-specific protease activity, not intrinsic instability.
- Spike-recovery test the prep method. Spike a known amount of peptide into blank matrix and carry it through your full precipitation and extraction workflow; poor recovery here points to prep bias, not degradation.
- Cross-check with an orthogonal method. If UPLC-UV and LC-MS disagree on percent remaining, suspect a co-eluting matrix interferent rather than real chemistry.
- Run the standard mix before and after the sample batch. A shift in retention time or peak area for your hydrophilic standard peptide is the fastest way to catch column fouling before it corrupts a whole run.
- Audit vial material and autosampler settings whenever a low-abundance peptide shows inconsistent results, since adsorption losses can look identical to real degradation.
Pro Tip: Keep a small reserve of your zero-time-point sample frozen and untouched. When a stability result looks suspicious, re-running that reserve against a fresh calibration curve is the fastest way to rule out instrument drift before you blame the peptide.
Sample-prep errors that most commonly bias results include inconsistent centrifugation speed between batches and pipetting variability in the organic solvent ratio during precipitation. Both are fixable with a written SOP and a second-person verification step before results get reported as final. When any single check above fails, the right move is to re-run the experiment with the correction applied, not to annotate the anomaly and move forward.
How Does Supplier QA Reduce Variability in Stability Studies?
Every stability result inherits the quality of the starting material, and a peptide with unverified identity or hidden impurities will generate degradation data that reflects the impurity profile, not the compound itself. Before starting any formal stability program, request a Certificate of Analysis confirming identity by mass spec, purity by HPLC, and clear storage and handling notes from whatever supplier provides your starting material.
Peptasticlabs verifies each batch to ≥99% purity via HPLC, with independent third-party confirmation and full batch documentation available on request. That level of upstream verification matters directly to the study you're designing: if your zero-time-point sample already contains 3% of an unidentified impurity, every downstream degradant assignment becomes ambiguous. Starting-material uncertainty is one of the most under-diagnosed sources of false stability signals in published peptide research.
A practical procurement checklist before launching a formal program: confirm CoA availability, confirm the analytical method used for identity and purity (HPLC alone is not equivalent to HPLC plus mass spec confirmation), and request storage and shipping documentation. Peptasticlabs' guide to avoiding degradation during storage and its research and QC overview outline the documentation researchers should expect as standard practice, not a premium add-on.
What Actually Moves the Needle in Peptide Stability Work
Most peptide stability programs over-invest in long-term chamber studies and under-invest in the two things that actually determine whether the data means anything: SIM development and supplier quality control. A beautifully executed 12-month ICH study built on a method that can't resolve deamidation from the parent peak is expensive noise.
Run forced degradation first, every time, even when the timeline pressure pushes toward skipping straight to long-term storage. It reveals the mechanism before you've committed months to a study design that might be targeting the wrong pathway entirely. And audit the starting material before you audit the method. A contaminated or misidentified peptide will fail every downstream check you throw at it, and no amount of chromatographic elegance fixes that upstream problem. The SOPs that prevent handling artifacts, aliquoting discipline, vial material, autosampler conditioning, cost almost nothing to implement and quietly prevent the majority of "unexplained" instability results that waste bench time chasing phantom chemistry.
— Tintastic
Source Verified Peptides for Your Stability Studies
Stability testing only produces meaningful data when the starting material is what the label says it is. Peptasticlabs supplies research-grade peptides independently verified to ≥99% purity by HPLC, with full batch documentation and a Certificate of Analysis available on request, so the degradation curve you measure reflects the peptide's real chemistry rather than an unverified impurity profile.
That documentation matters most at the zero-time-point stage of any study, where an unidentified contaminant can quietly bias every downstream degradant assignment. The Peptasticlabs catalogue spans metabolic, cognitive, tissue repair, longevity, immunology, and cosmetic research lines, with bulk and wholesale options for labs running multi-batch stability programs. Request a Certificate of Analysis for your compound of interest, order reference material from the catalogue, and pair it with the SOP guides referenced throughout this article to bring handling-related variability under control before your first time point.
Sources
Three sources anchor most defensible peptide stability work. ICH Q1A(R2) is the regulatory backbone for any study supporting a shelf-life or re-test claim. The protocol-comparison study on plasma and cell-culture stability documents exactly how sample-prep choices distort results, which is essential reading before finalizing a precipitation method. The LC-MS library-based degradation methodology paper covers direct-injection tradeoffs and column-fouling diagnostics in detail. Together, these three cover the regulatory, experimental, and analytical dimensions of the work.
FAQ
How Long Can BPC 157 Stay Unrefrigerated?
Reconstituted peptide solutions generally show measurable degradation over hours to days at room temperature, depending on concentration and buffer, so they should be refrigerated at 4°C for short-term use and kept lyophilized at −20°C to −80°C for any storage beyond a few days.
What Are the ICH Guidelines for Stability Testing?
ICH Q1A(R2) sets the framework for long-term, intermediate, and accelerated storage conditions, batch selection, testing frequency, and stress-testing principles used to support a shelf-life or re-test period claim.
How Long Do Peptides Stay Stable?
Stability duration varies widely by sequence, formulation, and storage condition, but lyophilized peptides stored at −20°C to −80°C generally remain stable far longer than reconstituted solutions, which are usually treated as short-term working stocks measured in days to weeks.
How Do I Test If My Peptides Are Real?
Confirm identity and purity through HPLC combined with mass spectrometry, which verifies both the correct molecular mass and the absence of significant impurities; request a Certificate of Analysis from your supplier, such as documentation provided on request, rather than relying on visual inspection alone.